Purchase a resource plan
Level: Beginner
In this guide, we will walk you through the process of placing a new order for a resource plan on UltraServers. Follow the step-by-step instructions below to successfully purchase a new plan.
How to Purchase a Resource Plan
Step 1: Navigate to Pricing

Step 2: Configure Resource Plan
Note: You can use a discount or coupon code if you have received one.
- Next, if you need extra resources, you can configure your plan with additional vCores or Storage by selecting your choice in the configuration sliders.
- Then, choose the billing cycle you want for your resource plan.

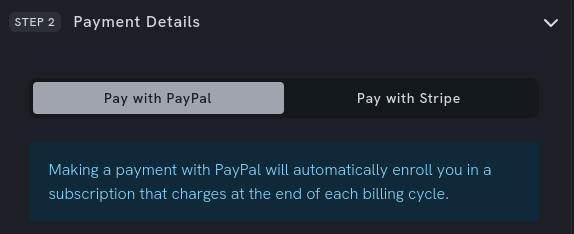
Step 3: Select Payment Method
- Next, select your preferred method of payment.
- Pay with PayPal will automatically enroll you in a subscription that charges your PayPal account at the end of each billing cycle.
- Pay with Stripe enables us to charge your card automatically for future invoices. You can cancel this arrangement at any time by removing your card from your account.
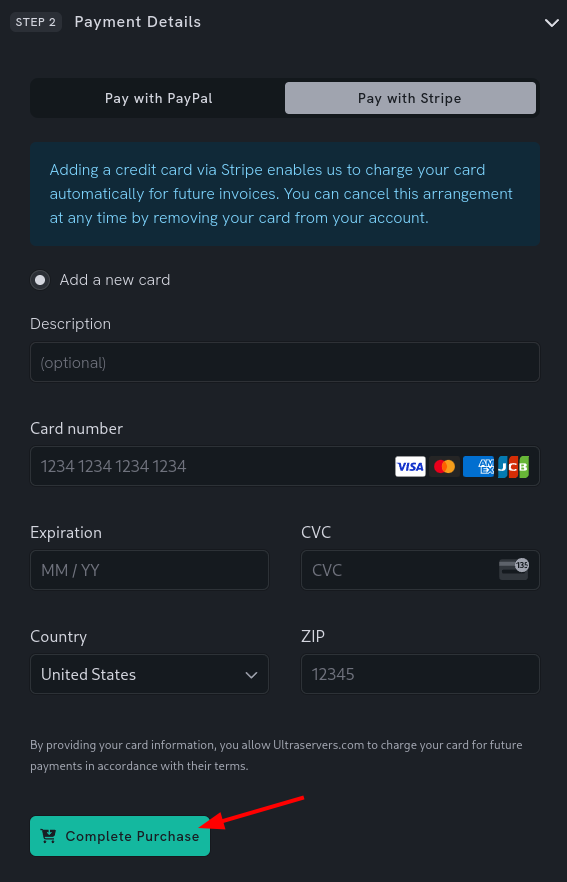
Step 4: Complete Purchase
- Next, if your choice of payment method is PayPal. Simply click Complete Purchase and log in to your PayPal account when prompted, and confirm the purchase.
- If your choice of payment method is Stripe, you will be asked to fill in your credit/debit card details.
- Fill the form with your credit/debit card details:
- Description: An optional descriptive text shown for this card in your dashboard.
- Card number: 16 digits found on the front of your card.
- Expiration: 4 digits expiration date shown on the back of your card.
- CVC: 3 digits shown on the back of your card.
- Country: Country where your card is issued.
- ZIP: Postal ZIP code, only needed for certain countries.
- To confirm your purchase, click the Complete Purchase button.
Step 5: See Invoice
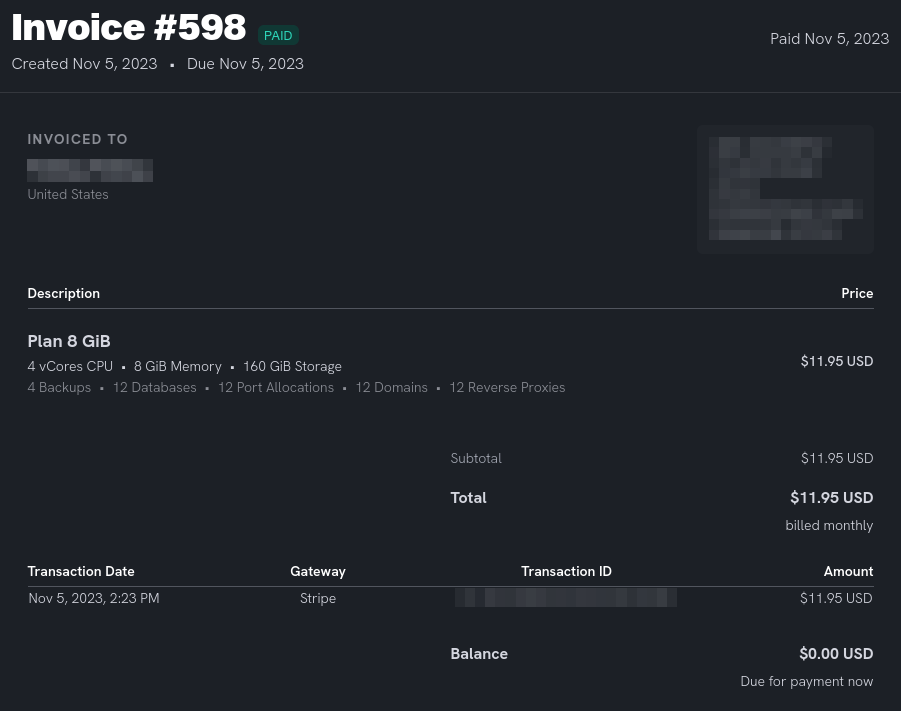
- If successful, you should now see your invoice has been marked as PAID.
- You can now navigate to the Inventory, and create game servers by assigning resources from the plan you just purchased.
If you are having trouble with this, you can open a support ticket here!
Feedback and suggestions regarding this article are welcome in our Discord server