Manually Exporting Your MySQL database
Level: Intermediate
In this guide, we will demonstrate step-by-step instructions on manually exporting your MYSQL database.
Exporting your MYSQL database
Databases makes managing and accessing your data easier, especially if you have multiple items needing to access it. However you may find yourself needing to export the data to keep as a backup or move databases. This guide will cover how.
Windows
Step 1: Downloading a Database management software
HeidiSQL is a well known and simple Graphical MySQL database management tool. However, you should always do your research in what software you install.
-
Visit the HeidiSQL download page and download the installer.
-
Once you have located the downloaded file, you will need to run it, select the file and install the software.
-
Make sure to have HeidiSQL open.
Step 2: Grabbing the details to your Database
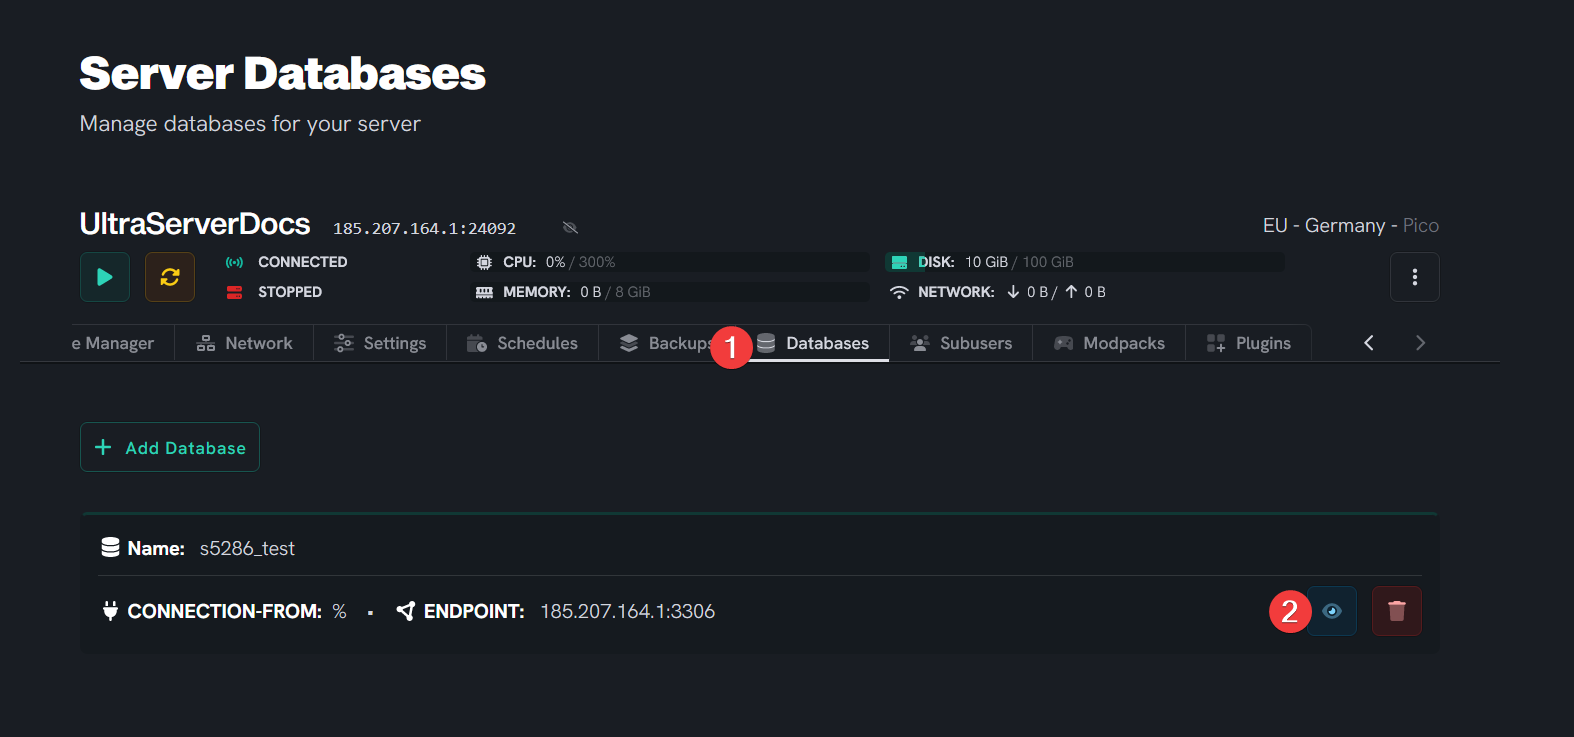
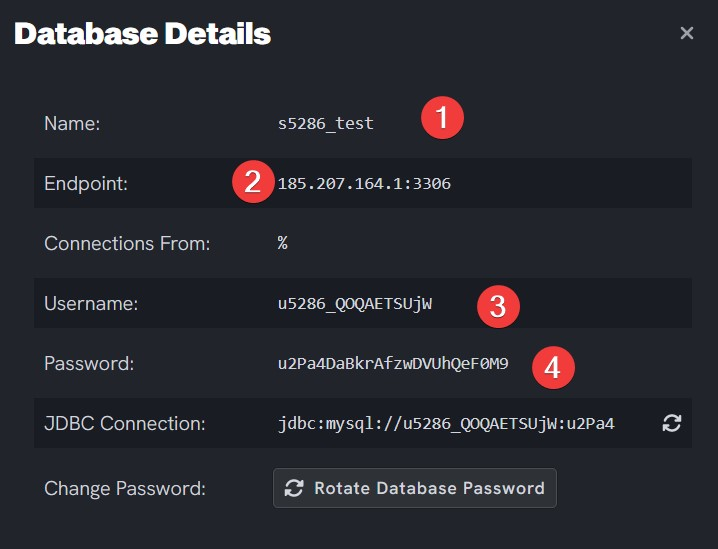
- Head to your server Dashboard and head over to the Database tab to make note of your credentials.
- You will want to keep a note of the details such as IP address, username, password and database name.
Step 3: Exporting your database
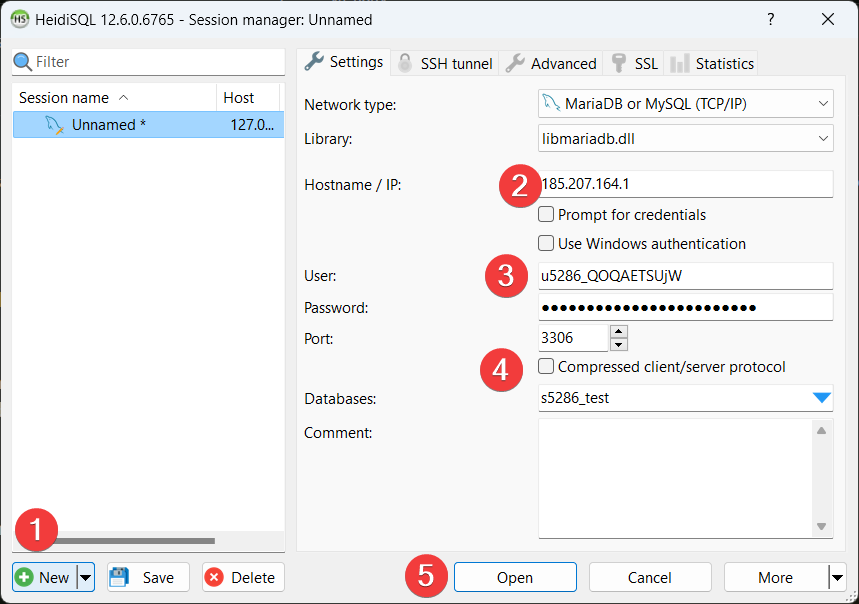
- First, we need to get HeidiSQL logged in so it can manage and export your database.
- Click on the New button so we can add the session.
- Input the IP address of where your database is hosted.
- Enter your username and password credentials (refer to last step).
- Input the name of the Database you wish to connect to.
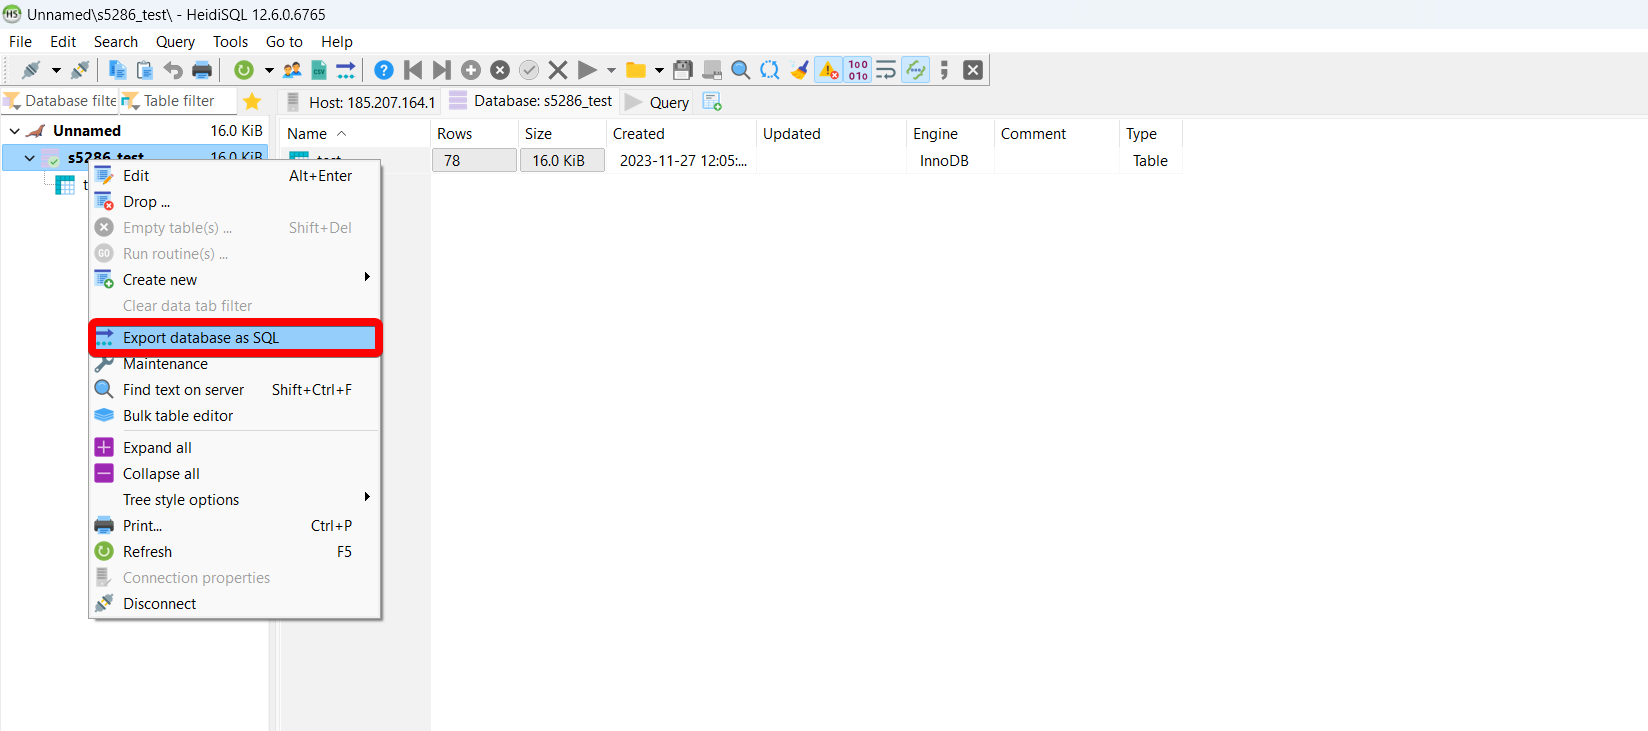
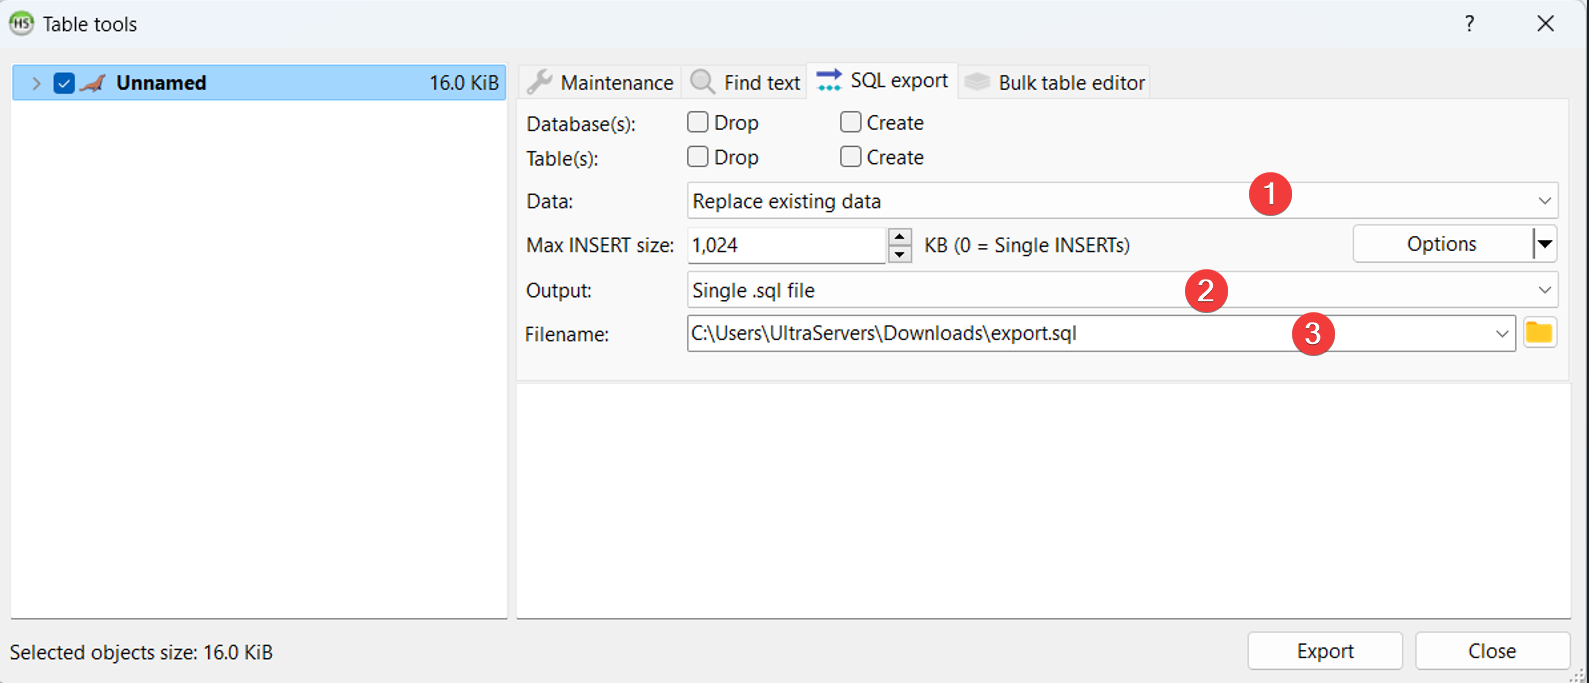
- Once connected, you will see a lot of information regarding your database. You will want to right-click on the database and hit export database as SQL.
- You may choose between insert or insert and replace existing data. Either way, MySQL will continue.
- You may decide how you want your data to be stored. Either a singular database file or just in a zipped SQL folder.
- Make sure the file is saved where you want it to be.
- In your folder, you will see the file from the MySQL backup.
Linux (Ubuntu/Debian)
Please keep in mind, you may require sudo privileges. If you do not know what a command does, then please do research. For example, you should understand installing packages, navigating folder structures, etc.
Step 1: Installing the client
- Open your terminal.
- Execute
sudo apt update -yandsudo apt install mariadb-client -ywhich shall install the latest version of a MySQL client. - Execute
mysql --versionto verify it has been installed.- If you receive a message command not found, then try typing
bashand run the command again.
- If you receive a message command not found, then try typing
Step 2: Grabbing the details to your Database
- Head to your server Dashboard and head over to the Database tab to make note of your credentials.
- You will want to keep a note of the details such as IP address, username, password and database name.
Step 3: Exporting your database
- Open your terminal.
- Choose a spot to download your backup. Let's say you want it to do it in your home directory, so you use
cd ~. - Execute the following command:
- Make sure to replace
USERNAME,PASSWORDandDATABASE_NAMEwith the details from the previous step.
- Make sure to replace
mysqldump -h DB_IP -u USERNAME -pQ'PASSWORD' DATABASE_NAME > backup.sql
- Unfortunately,
mysqldumpdoes not have a way to view the progress of the dump, so you need to wait for it to finish.
If you are having trouble with this, you can open a support ticket here!
Feedback and suggestions regarding this article are welcome in our Discord server.