Set Up a Reverse Proxy
Level: Advanced
In this guide, we will show you step-by-step how to set up a reverse proxy for your Minecraft server. In this example, we will be using Cloudflare, but the steps will be similar for any domain provider. By doing this, we'll be able to redirect HTTP traffic from a specific domain (e.g., squaremap.example.net) to the right port on your server, making it easier for users to access certain resources, like a Minecraft map plugin. It's important to note that this method doesn't apply to the game itself; for that, you'll need to set up an SRV record.
How to Set Up a Reverse Proxy for your Minecraft Server
You must have purchased your own domain name from a domain provider before continuing.
Step 1: Sign in to your Domain Provider Account
In this walkthrough, we are using Cloudflare. Your domain may be hosted with a different provider such as GoDaddy, NameCheap, Domain.com, etc. The following steps will differ slightly for each provider.
Step 2: Access the DNS settings
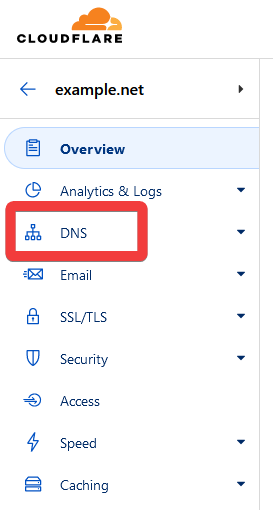
- Click on the domain you want to configure, then navigate to the DNS section.
Step 3: Create a CNAME record
![]() Click on + Add record.
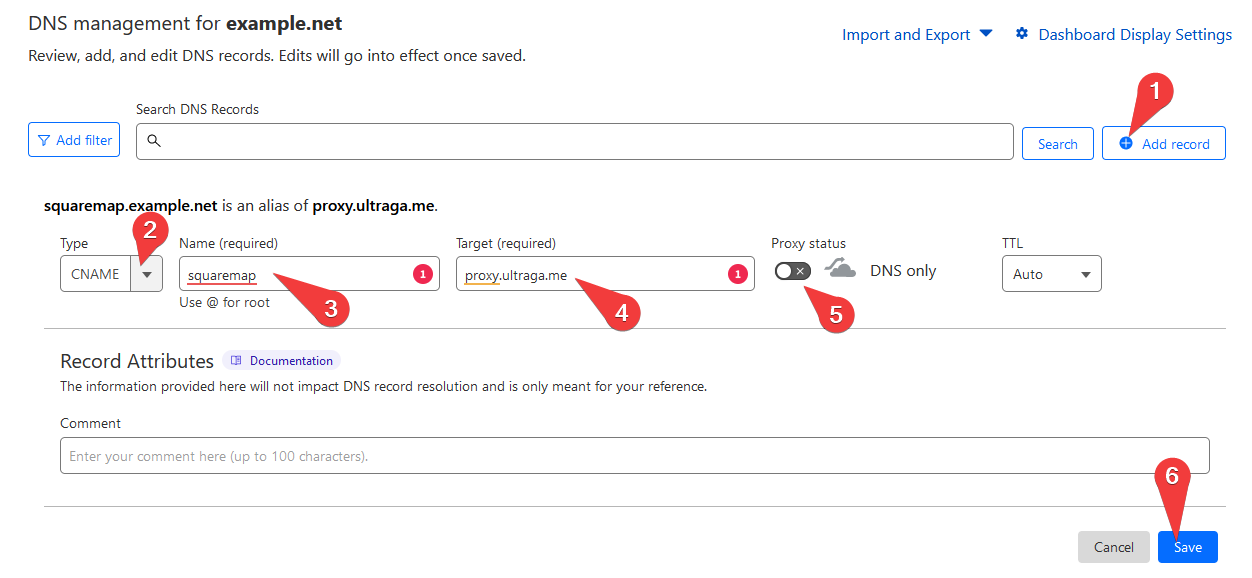
Click on + Add record.
![]() From the dropdown, select CNAME.
From the dropdown, select CNAME.
![]() In the Name field, put the subdomain you want to use (in our example,
In the Name field, put the subdomain you want to use (in our example, squaremap if you're going to create squaremap.example.net).
![]() In the Target field, put
In the Target field, put proxy.ultraga.me
![]() Disable the Proxy status.
Disable the Proxy status.
![]() Click on Save.
Click on Save.
Step 4: Sign in to your UltraServers account
Step 5: Access the Ports page
- Go to your server's management page, then navigate to the Ports section.
Step 6: Add the domain name
- Here, you should see a list of your allocated ports. Next to the port you want to forward, click on Reverse Proxy (if the port doesn't exist, then create one).
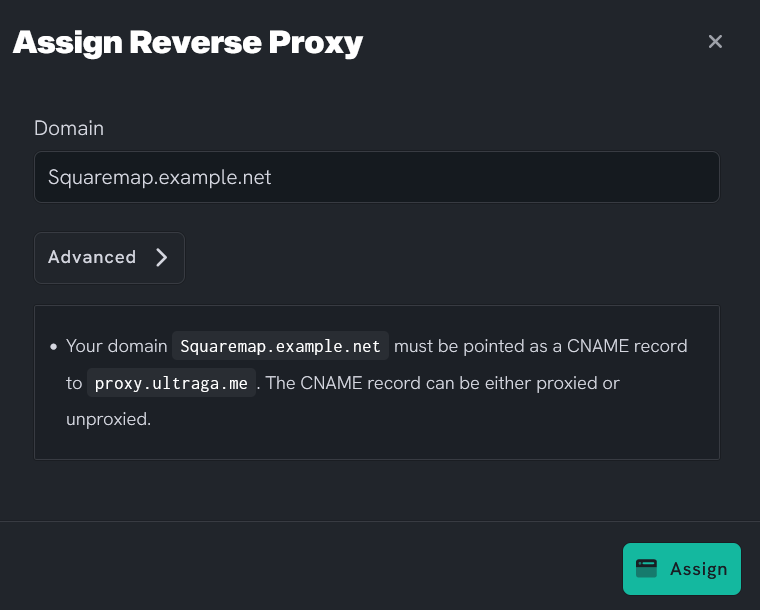
- In the popup, enter the full domain you set up in Cloudflare (e.g.,
squaremap.example.net), then click Assign.
In the advanced settings, you can enable and create an SSL certificate as well, but you may find this is not necessary for your requirements.
We also have web socket support in the advanced settings, which means that if a plugin using the reverse proxy wants to maintain a web socket connection, it can.
Step 7: Check your setup
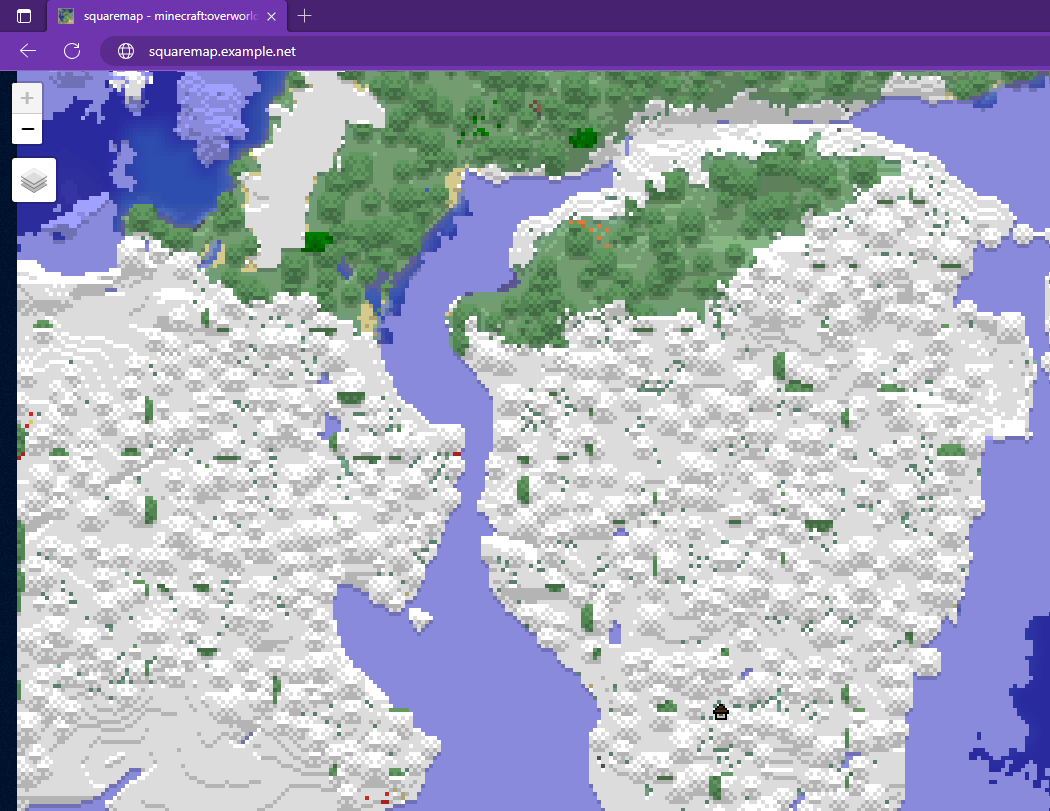
Please note that while this will work for HTTP traffic (like a web-based Minecraft map plugin), it will not work for Minecraft game traffic. For that, you need to set up a SRV record in your DNS settings, which instructs game clients on how to connect to your server at the correct port.
Setting up a reverse proxy can make certain resources easier to access, and can even help mitigate certain types of attacks by obscuring the actual port you're serving from. By following this guide, you can streamline access to your server's resources and improve your users' experience. Remember to configure your plugin too :D
If you are having trouble with this, you can open a support ticket here!
Feedback and suggestions regarding this article are welcome in our Discord server.


