Ping test doc for users (MTR)
Level: Intermediate
This guide demonstrates how to perform a ping test using WinMTR. This free network diagnostic tool combines the functionality of the traceroute and ping utilities in a single network diagnostic tool. We'll also explain the significance of the results and how to interpret them. The program WinRaR extracts the files.
Ping test using winMTR
Step 1: Download and install winMTR
- You can download WinMTR from its official GitHub page. There, you will find winMTR-v100-static.zip and winMTR-v100.zip. Download winMRT-v100.zip
Step 2: Extract the zip file
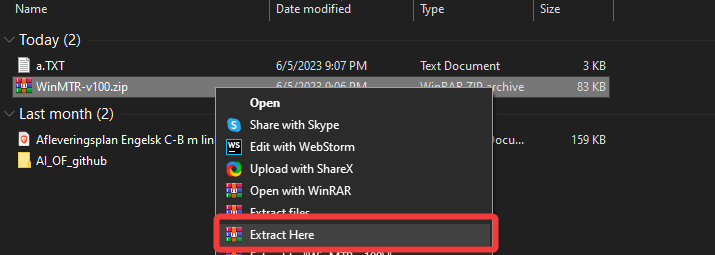
- After you've installed the tool, right-click the zip file and click Extract here.
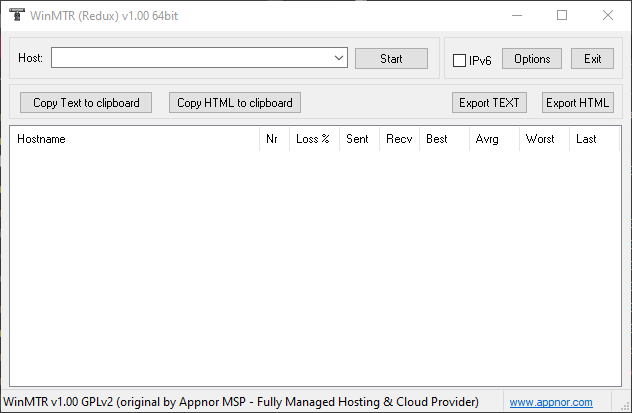
- You will see five files in your downloads folder when you've extracted the folder. Open WinMTR64.exe. You'll see a simple interface to enter the host you want to ping and traceroute.
Step 3: Enter the host
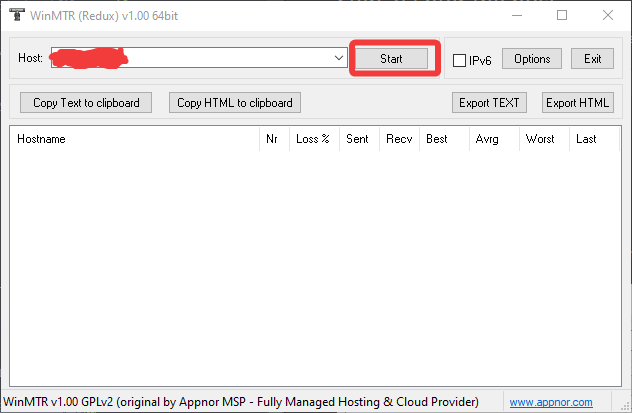
- In the Host field, input your server IP address or domain you wish to test, for example:
<Your Minecraft server IP>
Note:- Use the server's IP address if you've created an Ultraserver subdomain, as subdomains are SRV records for Minecraft, not CNAMEs, and won't function in this context.
Step 4: Start the ping test
- Click the
Startbutton to initiate the test. The results will begin to populate in the window below.
Step 5: Interpret the Results
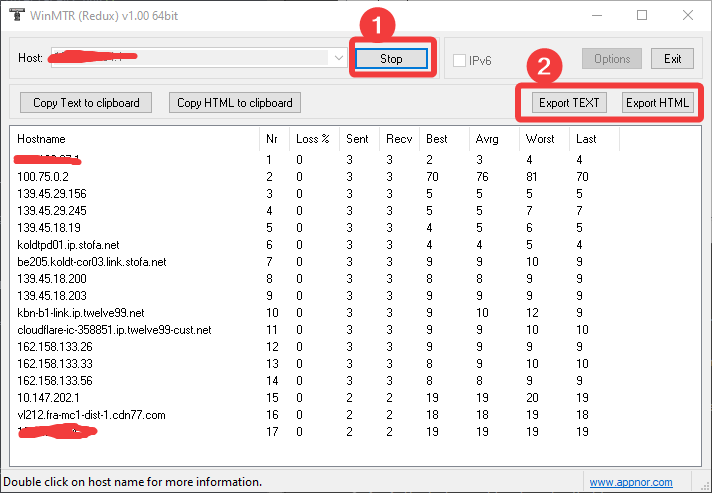
- After running the test for a few minutes (preferably 5-10 minutes), you will see various columns filled with data.
Here's what each column signifies:
- Hostname: The router’s name or IP address at that hop.
- Number (Nr): The hop count.
- Worst: The longest time (in ms) data packets travel from your computer to the host.
- Best: The shortest time (in ms) data packets travel from your computer to the host.
- Avg: The average time (in ms) data packets take to travel from your computer to the host.
- Sent: The number of sent packets.
- Recv: The number of received packets.
- Loss %: The percentage of lost packets.
- Last: The last round trip time for that hop.
Step 6: Stop the Test and Export the Results
- After you've run the test for a sufficient amount of time, click the
Stopbutton if you wish to save the results for future reference or send them to a network technician; clickExport TEXTorExport HTMLto save the results in the respective formats.
If you need help, you can open a support ticket here!
Feedback and suggestions regarding this article are welcome on our Discord server


