How to reset the Nether in Minecraft Java Edition
Level: Intermediate
In this guide we will step-by-step show you how to reset the Nether in Minecraft Java Edition with Vanilla version. The Nether is the second dimension in Minecraft, and can be accessed via the main Overworld using a Nether Portal.
Reset the Nether on Minecraft Vanilla
Step 1: Login to the Dashboard
- See our login instructions guide over here!
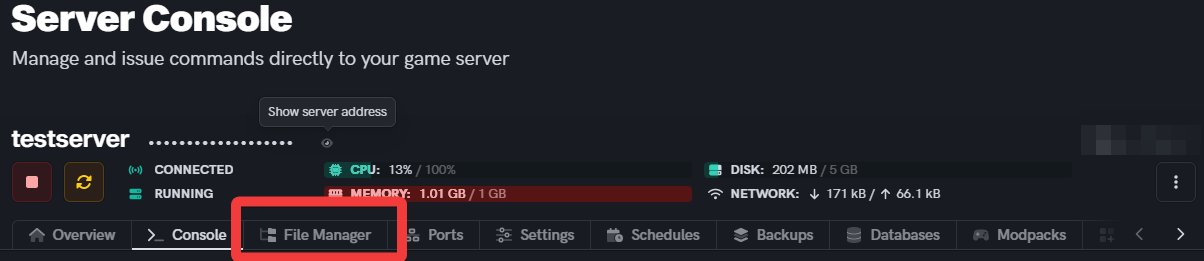
Step 2: Stop your server & navigate to the File Manager tab
- From your Dashboard, go to the Inventory tab.
- Scroll down to one of your servers, and click on the Stop button.
- Then, click on the Manage button.
- Finally, choose the File Manager tab from the top navigation panel.


Step 3: Delete the world/DIM-1 directory
- Locate and enter the world directory by clicking on it.
- Select the DIM-1 directory.
- Then, click on the Delete button.
- Confirm the deletion of the DIM-1 directory.


Step 4: Start the server
- Scroll back to the top of the page.
- Then, click on the Start button.

Reset the Nether on Minecraft Paper
Step 1: Login to the Dashboard
- See our login instructions guide over here!
Step 2: Stop your server & navigate to the File Manager tab
- From your Dashboard, go to the Inventory tab.
- Scroll down to one of your servers, and click on the Stop button.
- Then, click on the Manage button.
- Finally, choose the File Manager tab from the top navigation panel.
Step 3: Delete the world_nether directory
- Select the word_nether directory.
- Then, click on the Delete button.
- Confirm the deletion of the world_nether directory.


Step 4: Start the server
- Scroll back to the top of the page.
- Then, click on the Start button.

If you are having trouble with this, you can open a support ticket here!
Feedback and suggestions regarding this article are welcome in our Discord server